|
Best Monogrammed, Personalized Diaper Bag Examples
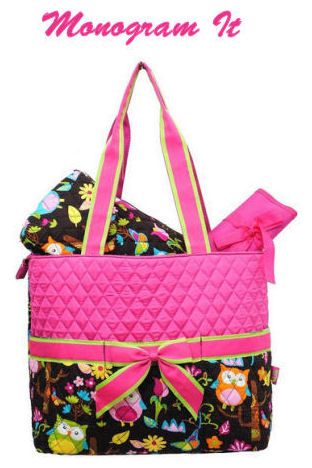
There are loads of ways to personalize your diaper bag. This page will not just have information and reviews for the crafty moms that know their way around a sewing machine or serger! Here are some ideas. You can take a plain baby bag and do wonderful things to it for a few bucks with a classic monogram or by stitching on a grosgrain ribbon as trim or make a bow and anchor it.

If sewing is just not your thing, get some fabric paint and stencil your monogram on the front of the bag! For that matter stencil or paint whatever you want! You can repeat a pattern of palm trees, bunny rabbits or teddy bears in whatever color you like! Take it from me after you personalize that baby bag, you will not recognize it!
I’m not picking on Vera, I think she makes a lovely baby bag out of quilted fabric, and you can too! This is a style of baby bag that you can do yourself. Your product will be stylish and cool because YOU will have had creative control! . Well, almost…you do have to have a pattern. To finish the bag find the center of the widest sides of the bag. Mark your hemfolds according to this graphic. About ¾ to 1 Inch and 1 ½ to 2 inches for the 1st and 2nd fold lines (see the graphic dotted lines) from the unfinished top of the bag. Pin your handle fabric (again refer to the graphic) along the 2nd fold with the handles against the wrong side of the bag with each handle end spaced about 5 inches from the other. Fold the 2nd hem down including your raw handle ends. Fold the handles up then pin in place. Run a stitch around the complete top hem. Stitch slowly, firmly and carefully over the handle ends as there are several layers of fabric here. Stitch a nice neat square or an X over the ends of the handles for extra reinforcement. You can also buy a pair of handles and attach them to your baby bag with ribbon or a fabric tie. Embellish! There you go! Now, you can have a blast embellishing and personalizing your diaper bag with fun fur, glitzy buttons, monogramming or do a cross-stitch pattern on the sides of the baby bag! Make several! What a unique baby shower gift a handmade diaper bag will be! A friend would rather have a lovely homemade gift from the heart than a Coach or a Kate Spade baby bag! Well, in addition to a Coach Diaper Bag or a Kate Spade anyway! Most moms have a distinctly shallow nature when it comes to diaper bags. Whether it be a designer diaper bag,backpack,personalized or handmade diaper bag they all have a place in our collection of unique baby gear. After you have made your own diaper bag I hope that you will stick around Unique Baby Gear Ideas to explore the many nursery themes, decorating ideas and other features that new parents may find very helpful. |
When you click on links to various merchants on this site and make a purchase, this can result in this site earning a commission. Affiliate programs and affiliations include, but are not limited to, Amazon and the eBay Partner Network such as the ones to your left on this page. Please see our Affiliate Disclosure page for more information.
More UBGI: Rss Feed | Facebook | Twitter


New! Comments
I would love to know what you think of our site! Leave me a comment in the box below.