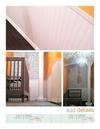
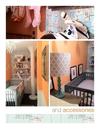
Baby's Walk-In Nursery
by Brandon & Maggie
(Brooklyn, NY)
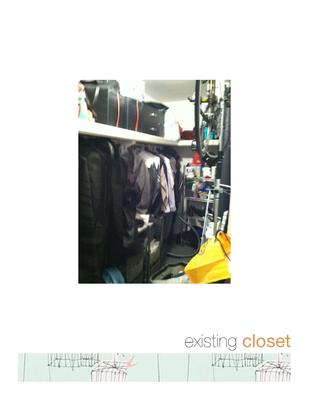
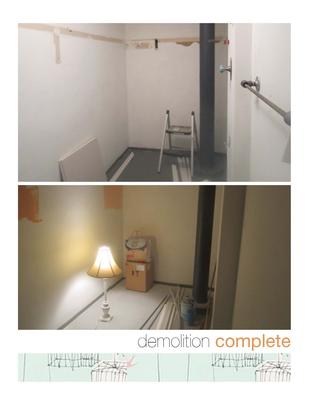
Existing walk in closet
My wife and I live in an old soap factory conversion loft here in Brooklyn (DUMBO)so when it came to planning our baby's walk-in nursery we had a bit of a hurdle. The layout of our apartment is one large open living space except for the bathroom and..the walk in closet!
Go Here to See More
It took some convincing in the beginning, but I'm so glad my wife stuck with her gut and pushed the need for a "real" room for the baby with a door so we wouldn't have to tip-toe around the apartment during nap time.
The pictures do a fairly good job of demonstrating my reasons for balking at the idea at first. Although the closet is large; it was packed to the point you could barely see the back wall.
We broke out the tape measure, sketched out a few ideas and plans based on the furniture we liked and since it all seemed to work, we decided to go for it!
There were a number of challenges such as where to put baby's "stuff.
Part of our overall need list was to create a second bedroom area for all the family coming and going once baby was here. To accomplish this, we made a new free-standing, partially enclosed closet that ended up creating the walls needed to make a private second bedroom (while still filtering light to the other side of the apartment - another challenge of this design).
Second, since we rent we had to build this in such a way that once our lease was up (and if we decided to move) we could easily change it right back to a closet. For now it would be an upgraded closet.
In a nutshell, we needed to make our >1000sf apartment a highly efficient, flexible space - and somehow figure out a way to make it both beautiful and functional. ;-)
A few weekends of hard work later you would never know this nursery room was ever a closet. It's now our favorite room in the whole house. We have a fabulous second bedroom area and just love the new layout. It turned out even better than we thought!
We, like many other people, had no budget for this so we patiently thought through every detail to make it work for around $500.
Doing it ourselves (DIY) including the electrical and drywall work saved us enough money for my wife to feel better about taking more time off work. And there's nothing more gratifying and fun than working together to make your baby's first room!
The Steps
Step 1 - demolition
Step 2 - electrical work
Step 3 - repair/replace drywall, spackle, sand
Step 4 - clean/prep for finishes
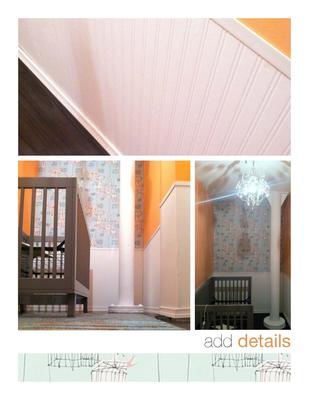
Step 5 - Paint, wallpaper, wainscoting
Step 6 - installing the faux wood floor (Home Depot Armstrong plank floor - LOVE it. We can beat it up, easily clean it up and know we only spent $70 on the whole floor!
Step 7 - installing baseboards and trim
Step 8 - touch ups
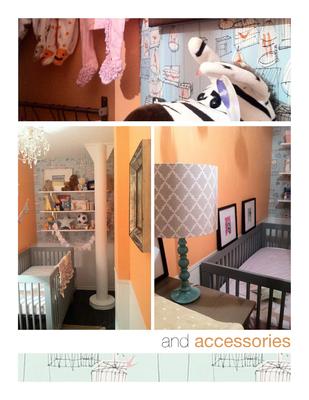
Step 9 - the furniture
In the end, I can't imagine a nursery any bigger. Everything in the baby's walk-in nursery has a perfect little place. It's very intimate and it fits Wren perfectly! Everything in the room is practically within reach yet it's not over-crowded. We've got a little rocker for her, but that's just a few steps outside the door and faces the television.
BTW - our baby girl's name is Wrenley, but we'll call her Wren.;)
I hope that you have enjoyed our baby girl nursery pictures and that you will vote for our design to win the baby nursery photo contest.
Maggie & Brandon Walsh
Comments for Baby's Walk-In Nursery
|
||
|
||
When you click on links to various merchants on this site and make a purchase, this can result in this site earning a commission. Affiliate programs and affiliations include, but are not limited to, the eBay Partner Network and Amazon Affiliate Program such as the ones to your left on this page and others. Please see our Affiliate Disclosure page for more information.
More UBGI: Rss Feed |
Unique Baby Gear Ideas advises everyone to never use drop side baby cribs. It is illegal to buy, sell or use a drop side crib. If you own a drop side crib, please disassemble it and dispose of it at the local city or county waste dump.
