Free Easy Baby Hat Patterns to Knit or Crochet
We have some free, easy baby hat patterns to share that are so cute that you will want to grab some yard, your needles and begin knitting and crocheting this very day!
After you have finished a project, please use the form to send a picture of the beanie or cabled baby hat that you made with one of our featured hat patterns via the invitation form below.
Free Baby Hat Patterns and More!
If you find a glitch in the free baby hat pattern instructions such as a discrepancy in the number of stitches or where to combine or pick up a stitch, please send us a description of the error so that the necessary corrections can be made. We want this cute baby hat to be a successful knitting project for all that want to give it a try but even an intermediate knitting expert can make a mistake in written instructions.

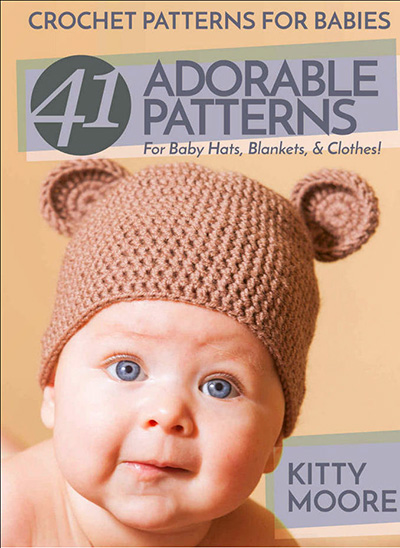
Go here to see 41 projects
Gauge
Everyone knits differently, so that it is impossible to gauge what kind of adjustments need to be made so that the size of your baby hat is correct. Please send suggestions that will help others that are attempting to knit a hat using the pattern. This cute baby hat is an excellent knitting project for all, both beginners and intermediates, that take the time to get the enjoyment of knitting and presenting it to the special baby in their life.
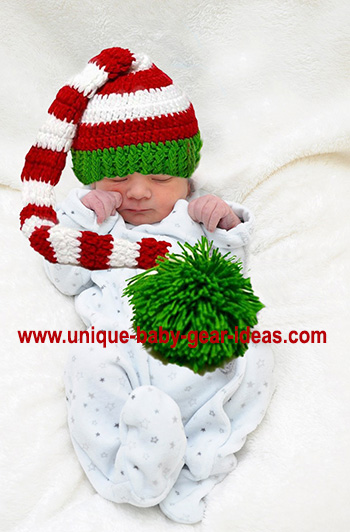
Crochet Baby Elf Hat Pattern
More Infant Hats to Crochet
Crochet Pattern for a Hat with a Large Flower
Crochet Pattern for a Hat with a Bow
Matching Baby Diaper Cover and Crocheted Hat with a Flower
Crochet Baby Tutu and Hat Pattern
Crochet Baby Cloche Hat and Diaper Cover Pattern
Free Baby Hat Pattern Instructions
Here are the free knitting instructions for a baby hat with a shell pattern. Once your baby knitting project is completed would you please send a picture of the knitted or crocheted baby cap? I will be happy to put a pic of your sweet baby wearing your knit baby hat on a page for the rest of the knitters to see!
Pins (use the appropriate size needles to get the right gauge for your particular knitting style)No. 22, and a length of some of the finest linen thread you feel will complete your baby hat to perfection.
The front part of the baby hat knitting pattern is knit with 2 needles alone. Cast on the necessary 208 stitches, knit 5 rows plain for the start or beginning. After these 5 plain rows, you must diminish 1 stitch in every shell, so as to have an ending number of only 192 stitches. Then 3 rows of the pattern, or shells, 2 rows of holes (for threading through your narrow decorative ribbon in the appropriate baby color of your choice) before repeating the pattern again, which is accomplished in the following manner: draw your thread forward, knit 2 stitches together, and repeat in this manner to the end of your knitting needle. Knit and complete 5 rows of plain between these 2 rows of holes; when this is completed, knit 4 rows of your shells, and then 2 rows of the holes as previously indicated in the instructions, with the 5 plain rows in between, then once more 2 rows of the pattern or shells.
You will now take the two other needles, and increase the number of stitches to 43 for the part of the infant’s cap that will fit the back of the baby's head; 2 rows plain, 1 row for inserting your satin baby ribbon in, and 3 rows of plain, you will then knit 8 rows of the shells; in your 7th row 7 holes are required to be in each shell, while in the eighth there will be only six.
After this step you will need to seam the first and second stitches, and then knit the third plain, without removing it from the needle, you will then give it a twist it. This will make make 2 stitches of this last single stitch; you will then seam the fifth stitch, slip the sixth stitch without knitting it, knit the seventh stitch plain, pass the sixth stitch over, knit the eighth stitch plain, slip the ninth stitch and knit the tenth stitch plain, and pass the ninth stitch over the tenth.
For the next row: you will seam the first stitch, slip the second stitch, knit the third stitch, and pass the second stitch over without removing or taking it off, and then you will knit it twisted; then twist the fourth, seam the fifth stitch, and knit the 3 remaining stitches plain.
After this row, you will knit 2 rows plain all around; after these plain rows, You will have to make a row of holes (necessary for inserting and threading your knitt baby cap ribbon in) by taking 2 stitches together, and making one as before. First knit 3 rows plain all around, knit another row of holes, and then knit 3 rows plain.
Then do the pattern 8 shells round the knit baby cap, and then continue until you have a decreased number of only 5 stitches instead of 9 (this number should not include the 2 twisted, and the seamed stitch).
After completing this row, seam the 1st, twist the 2d and 3d, seam the 4th, you will then raise a stitch by picking up a loop, slip the 5th, knit the 6th, and pass the 5th over, knit the 7th plain, and combine the 8th and 9th stitches together, then you will raise one stitch before beginning to seam.
For the next row:--You will Seam the 1st, slip the 2d stitch, knit the 3d stitch plain, and pass the 2d stitch half through, and knit it plain, seam the 4th , knit the 5th stitch plain, slip the 6th stitch without knitting it, knit the 7th stitch, and pass over the 6th to the left, and the 8th to the right, knit the 9th plain.
You will then do 2 rows of plain knitting all round this pretty knit baby cap pattern, 2 rows of the holes (again for inserting some narrow baby size decorative satin ribbon), knitting 2 rows plain to separate them, and 4 plain rows to finish off. Remove your stitches on a needle with heavy coarse thread, and tie off this portion of the baby hat knitting pattern.
Here is the pattern stitch:--First row:--You will seam the 1st stitch, and then twist the 2d and 3d stitches, seam the 4th stitch, knit the 5th plain stitch, pull your thread forward, then continue for 9 stitches plain, counting the 5th for 1; by putting your thread forward, you should have exactly 17 stitches.
Second row:--Seam the 1st, twist the 2d and 3d stitches, seam the 4th stitch, and knit the 17 plain stitches by then with 4 needles, and seam them when with 2 needles.
Third row:--Seam the 1st stitch, twist the 2d and 3d stitches, seam the 4th stitch, slip the 5th stitch, knit the 6th plain stitch, and pass over the 5th stitch; knit 15 of the stitches plain, including the 6th stitch, and take 2 stitches together at the 15th.
Fourth row:--The same as the 3d, with the exception of the number, which is 13 this time, diminishing at the first and thirteenth as before.
Fifth row:--The same as the fourth row, only you will now have a diminished number of 11 stitches instead of 13.
Sixth row:--The sixth row is the same as the fifth, only you will now have 9 stitches instead of 11.
After the 6 rows, you begin at the first again, the 6 rows Will comprise the entire baby hat knitting pattern.
So, you have worked your way through to the end the first of our free baby knitting pattern. Now, you will want to see our free baby blanket knitting patterns!
We have many more free baby sewing patterns and stuff to offer here like more knitting patterns for baby hats and blankets so please return to Unique Baby Gear Ideassee the latest patterns and ideas for your nursery decorating project. The infant knitting pattern is a very old one that I located free in the public domain. I have done my best to simplify it according to modern knitting instructions. The pattern has been tested and should work according to my own great-grandmother who was still knitting homemade baby blankets, caps and booties at 95.
When you click on links to various merchants on this site and make a purchase, this can result in this site earning a commission. Affiliate programs and affiliations include, but are not limited to, the eBay Partner Network and Amazon Affiliate Program such as the ones to your left on this page and others. Please see our Affiliate Disclosure page for more information.
More UBGI: Rss Feed |
Unique Baby Gear Ideas advises everyone to never use drop side baby cribs. It is illegal to buy, sell or use a drop side crib. If you own a drop side crib, please disassemble it and dispose of it at the local city or county waste dump.

New! Comments
I would love to know what you think of our site! Leave me a comment in the box below.